Tutorial cosplay FREE! Haruka Nanase version del ending (desierto)/ ending one version.
Buenos dias de nuevo, porfin tengo tiempo para ponerme un poco al dia con este blog xD hoy vengo para enseñaros como hice el cosplay de haruka nanase del anime free! en la version del primer ending.
Obviamente lo primero que hice fue buscar fotos y documentarme buscando otros cosplays.
Hello again!, I finally have a little time to catch up with this blog xD today I come to show you how i did my Haruka Nanase cosplay from free! in the version of the first ending.
Obviously the first thing I did was look for pictures and document myself looking for other cosplays.

todo el material necesario yo ya lo tenia por casa asi que el coste del cosplay fue cero, pero lo que se necesita es:
-tela azul
-tela blanca (mucha)
-tela roja (retal pequeño)
-tela negra elastica
-pintura dorada
-goma eva finita
-pantalones anchos negros
-carton y spray plateado
(mas o menos)
all the material I already had at home so cosplay cost was zero, but what is needed is:
-blue Fabric
-White Fabric (lot)
-Red Fabric (small scrap)
-black elastic Fabric
-golden painting
-thin foam
-black wide pants
-carton and silver spray
TOP:
lo primero que hice fue ya teniendo el pantalón, la faja top negra que lleva debajo del pañuelo blanco,
para hacerlo simplemente cojí la parte superior de unas medias que tenia cortadas, aunque se puede hacer perfectamente con tela elástica tal cual.
TOP:
first thing I did was already having his pants, black top sash worn under white handkerchief,
to do so simply take the fabric and sew a rectangle
GORRO:
para el gorro nuevamente como es novedad en mi, no tenia ni idea de como hacerlo asi que... improvise xD
Coji el gorro de luffy ya que no tengo maniquí, y lo envolví con la tela blanca intentando que quedase el bulto arrugado ese que tiene, y en lugares determinados hice puntos con hilo y aguja para que no se desatara. luego también a mano le cosí un borde azul al rededor de la parte inferior que luego tenia que ser la bufanda, asi que largo poro uno de los bordes y le hice tres lineas con la pintura dorada en la punta. i con eso ya quedaba todo mejor XD
For the hat again as new to me, I had no idea how to do so ... improvise xD
i used Luffys hat cause y haven't got dummy, and wrapped with white cloth trying to stay crumpled lump that it have, and in some places I points with needle and thread to not struck. Also on hand will then sewed a blue edge around the bottom which then had to be the scarf , so pore over one edge and gave him three lines with gold paint on the tip. i was left with it all better XD
PAÑUELO:
otra cosa to fácil, el pañuelo que lleva alrededor del pecho, para esto tampoco me complique mucho asi que con un retal de tela largo enroscado y aguantado con imperdibles y ole.
SCARF:
another easy thing, the scarf worn around the chest, do it does not complicat me so far. with a scrap of fabric twisted and endured long with captive .
FAJA:
bueno por fin algo con mas trabajo XD, para esta parte yo como no tenia goma eva use una funda de esta de los folios y la pinte dorada, pero yo recomiendo hacerlo con goma eva, además como tiene relieves yo use pintura de relieve y con la técnica del pincel seco le hice sombritas de estas. lo chungo es que en la faja es donde va cogida la daga así que reforcé la faja en algunos lugares con trozos grandes de cartón, para que no se doblaran.
GAZA:
finally something good work XD For this part i used a sleeve for papers, but I recommend doing with EVA (but i havent got at the moment) also has reliefs as I use relief painting and woith dry brush technique I did shadows in all..The crappy it is that the strip is where you catch the dagger so I reinforced the strip in places with large pieces of cardboard, so that will not bend.
en el lugar donde se coje la daga envolví el mango de la daga con la faja i una parte i l otra de la faja con belcro autoadhesivo.
in the place where the dagger wrapped the handle of the dagger with the strip i il another part of the self-adhesive Velcro strip grabs it.
DAGA:
para la daga utilice una que tenia echa hace ya un año y le hice la funda. para la daga hice una base con cartón en tres capas y lo cubrí con bastante celo de carrocero. lo pinte plateado y le hice sombritas con pincel seco.
DAGGER:
use a knife toi made a year ago and made a case. Dagger for a base made of three layers of cardboard and covered with tape. silver paint it and I did shadows with dry brush.
en la foto tiene esta forma rara pero no tiene que ser asi, es normal, pero como la use para otro personaje, asi esta.
in the photo has this rare form but must also be normal, but like to use another character, so this
para la funda, use goma eva con la forma de la daga pegada con celo por los lados ya que luego encima le hice una funda de tela roja. le até una cinta roja con un lacito y asi se quedo:
for the cover, use EVA with the shape of the dagger stuck with zeal for the sides and then I made up a bag of red cloth. I tied a red ribbon with a bow and it stayed:
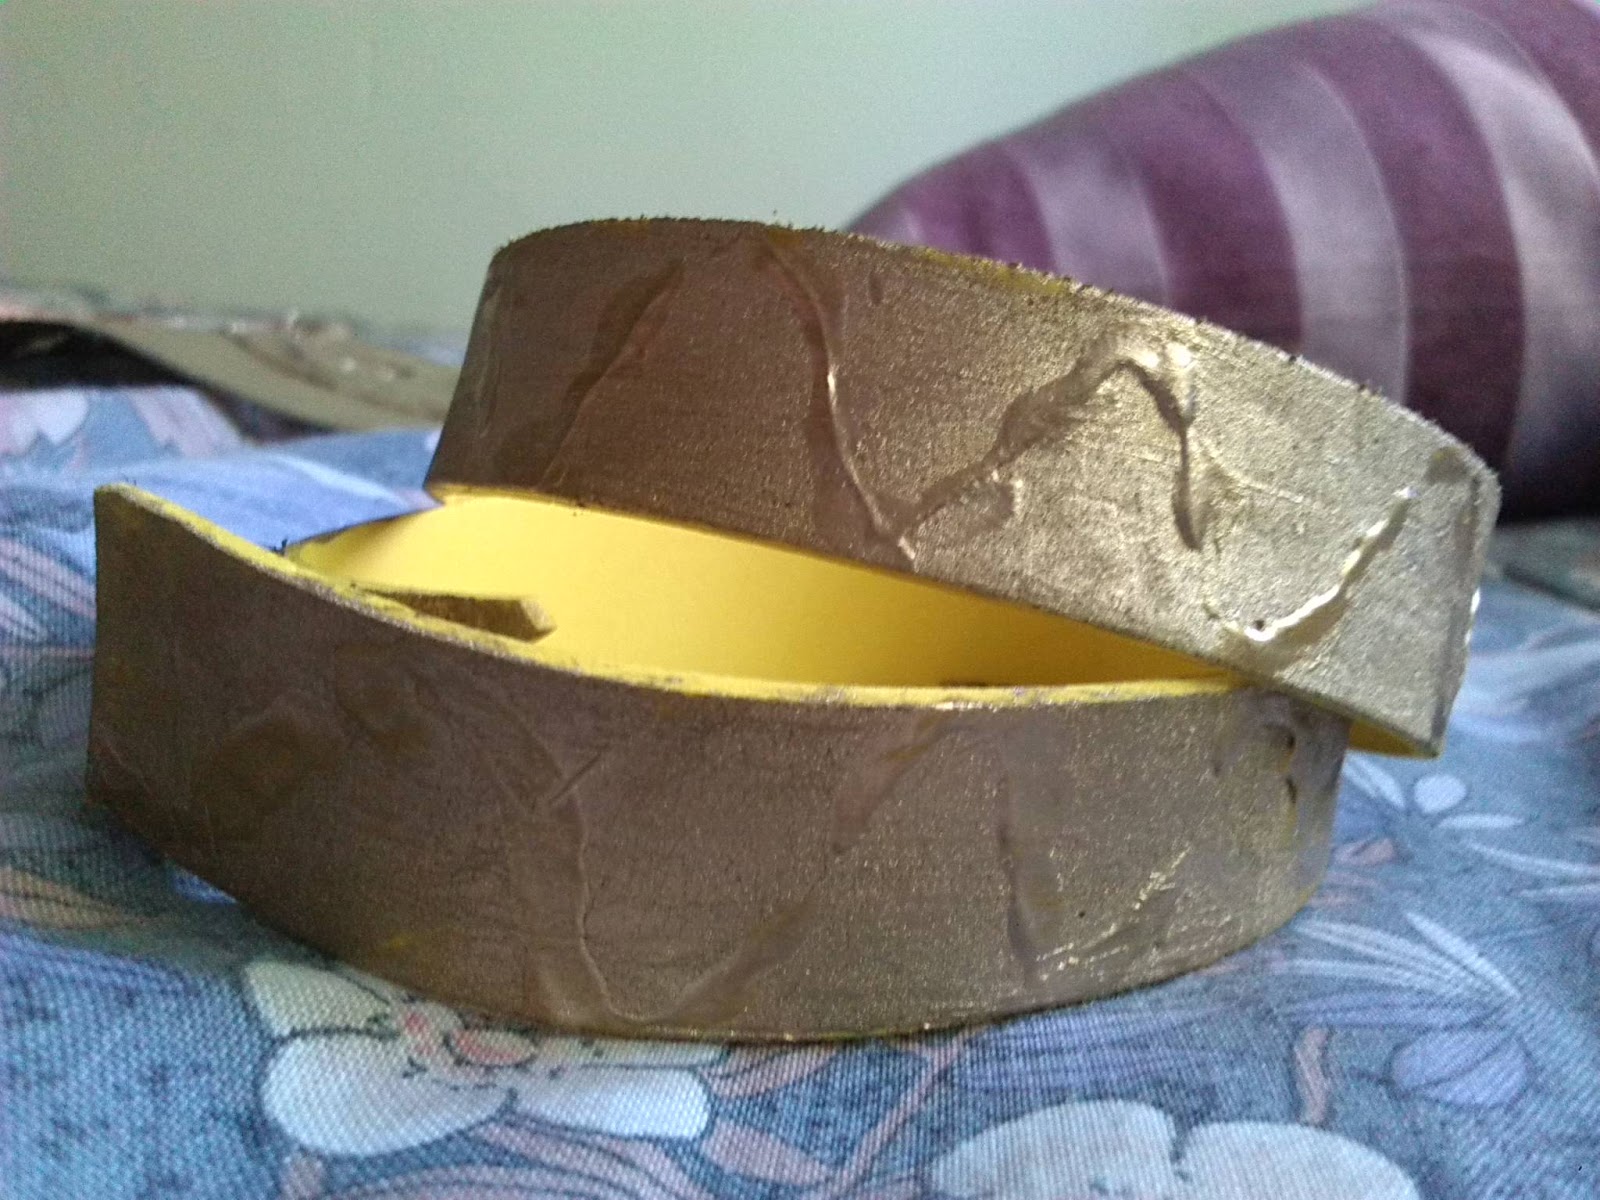
BRAZALETES:
mas de lo mismo que la faja, hice dos tiras largas de goma eva pintadas doradas mas relieves y luego con velcro autoadhesivo al final.
Bracelets:
more of the same as the belt, I made two long strips of foam gold painted, reliefs and more velcro adhesive at the end end.

CINTA.
el ultimo detalle que vi al final es esta cinta que cuelga des del top por debajo del brazo, yo por suerte encontre una cinta identica y la ate en el top y ya xD
TAPE.
the last detail I saw this film at the end is the top des hanging below the arm, luckily I found an identical tape and tie at the top and it xD
Y YA ESTA!!!
De echo este cosplay es increiblemente sencillo, por eso me vino antojo de hacermelo. y este verano haremos un video y fotoshoot en la playa con estos cusplis ya que buki se hara el de nagisa nwn
AND ALREADY !!!
In fact this cosplay is incredibly easy, so I came to let me craving to do it. and this summer we will do video and fotoshoot on the beach with these cusplis with buki as nagisa and kitoku as makoto !
Obviamente lo primero que hice fue buscar fotos y documentarme buscando otros cosplays.
Hello again!, I finally have a little time to catch up with this blog xD today I come to show you how i did my Haruka Nanase cosplay from free! in the version of the first ending.
Obviously the first thing I did was look for pictures and document myself looking for other cosplays.
todo el material necesario yo ya lo tenia por casa asi que el coste del cosplay fue cero, pero lo que se necesita es:
-tela azul
-tela blanca (mucha)
-tela roja (retal pequeño)
-tela negra elastica
-pintura dorada
-goma eva finita
-pantalones anchos negros
-carton y spray plateado
(mas o menos)
all the material I already had at home so cosplay cost was zero, but what is needed is:
-blue Fabric
-White Fabric (lot)
-Red Fabric (small scrap)
-black elastic Fabric
-golden painting
-thin foam
-black wide pants
-carton and silver spray
TOP:
lo primero que hice fue ya teniendo el pantalón, la faja top negra que lleva debajo del pañuelo blanco,
para hacerlo simplemente cojí la parte superior de unas medias que tenia cortadas, aunque se puede hacer perfectamente con tela elástica tal cual.
TOP:
first thing I did was already having his pants, black top sash worn under white handkerchief,
to do so simply take the fabric and sew a rectangle
GORRO:
para el gorro nuevamente como es novedad en mi, no tenia ni idea de como hacerlo asi que... improvise xD
Coji el gorro de luffy ya que no tengo maniquí, y lo envolví con la tela blanca intentando que quedase el bulto arrugado ese que tiene, y en lugares determinados hice puntos con hilo y aguja para que no se desatara. luego también a mano le cosí un borde azul al rededor de la parte inferior que luego tenia que ser la bufanda, asi que largo poro uno de los bordes y le hice tres lineas con la pintura dorada en la punta. i con eso ya quedaba todo mejor XD
For the hat again as new to me, I had no idea how to do so ... improvise xD
i used Luffys hat cause y haven't got dummy, and wrapped with white cloth trying to stay crumpled lump that it have, and in some places I points with needle and thread to not struck. Also on hand will then sewed a blue edge around the bottom which then had to be the scarf , so pore over one edge and gave him three lines with gold paint on the tip. i was left with it all better XD
 |
| gorro-desu |
otra cosa to fácil, el pañuelo que lleva alrededor del pecho, para esto tampoco me complique mucho asi que con un retal de tela largo enroscado y aguantado con imperdibles y ole.
SCARF:
another easy thing, the scarf worn around the chest, do it does not complicat me so far. with a scrap of fabric twisted and endured long with captive .
 |
| pañuelo + gorro |
FAJA:
bueno por fin algo con mas trabajo XD, para esta parte yo como no tenia goma eva use una funda de esta de los folios y la pinte dorada, pero yo recomiendo hacerlo con goma eva, además como tiene relieves yo use pintura de relieve y con la técnica del pincel seco le hice sombritas de estas. lo chungo es que en la faja es donde va cogida la daga así que reforcé la faja en algunos lugares con trozos grandes de cartón, para que no se doblaran.
GAZA:
finally something good work XD For this part i used a sleeve for papers, but I recommend doing with EVA (but i havent got at the moment) also has reliefs as I use relief painting and woith dry brush technique I did shadows in all..The crappy it is that the strip is where you catch the dagger so I reinforced the strip in places with large pieces of cardboard, so that will not bend.
 |
| daga con relieves chulis *w* |
en el lugar donde se coje la daga envolví el mango de la daga con la faja i una parte i l otra de la faja con belcro autoadhesivo.
in the place where the dagger wrapped the handle of the dagger with the strip i il another part of the self-adhesive Velcro strip grabs it.
DAGA:
para la daga utilice una que tenia echa hace ya un año y le hice la funda. para la daga hice una base con cartón en tres capas y lo cubrí con bastante celo de carrocero. lo pinte plateado y le hice sombritas con pincel seco.
DAGGER:
use a knife toi made a year ago and made a case. Dagger for a base made of three layers of cardboard and covered with tape. silver paint it and I did shadows with dry brush.
 |
| DAGAAA!" |
en la foto tiene esta forma rara pero no tiene que ser asi, es normal, pero como la use para otro personaje, asi esta.
in the photo has this rare form but must also be normal, but like to use another character, so this
para la funda, use goma eva con la forma de la daga pegada con celo por los lados ya que luego encima le hice una funda de tela roja. le até una cinta roja con un lacito y asi se quedo:
for the cover, use EVA with the shape of the dagger stuck with zeal for the sides and then I made up a bag of red cloth. I tied a red ribbon with a bow and it stayed:
 |
| daga + faja |
BRAZALETES:
mas de lo mismo que la faja, hice dos tiras largas de goma eva pintadas doradas mas relieves y luego con velcro autoadhesivo al final.
Bracelets:
more of the same as the belt, I made two long strips of foam gold painted, reliefs and more velcro adhesive at the end end.
CINTA.
el ultimo detalle que vi al final es esta cinta que cuelga des del top por debajo del brazo, yo por suerte encontre una cinta identica y la ate en el top y ya xD
TAPE.
the last detail I saw this film at the end is the top des hanging below the arm, luckily I found an identical tape and tie at the top and it xD
Y YA ESTA!!!
De echo este cosplay es increiblemente sencillo, por eso me vino antojo de hacermelo. y este verano haremos un video y fotoshoot en la playa con estos cusplis ya que buki se hara el de nagisa nwn
AND ALREADY !!!
In fact this cosplay is incredibly easy, so I came to let me craving to do it. and this summer we will do video and fotoshoot on the beach with these cusplis with buki as nagisa and kitoku as makoto !
 |
| y cosplay finito!!!! |


Comentarios
Publicar un comentario